
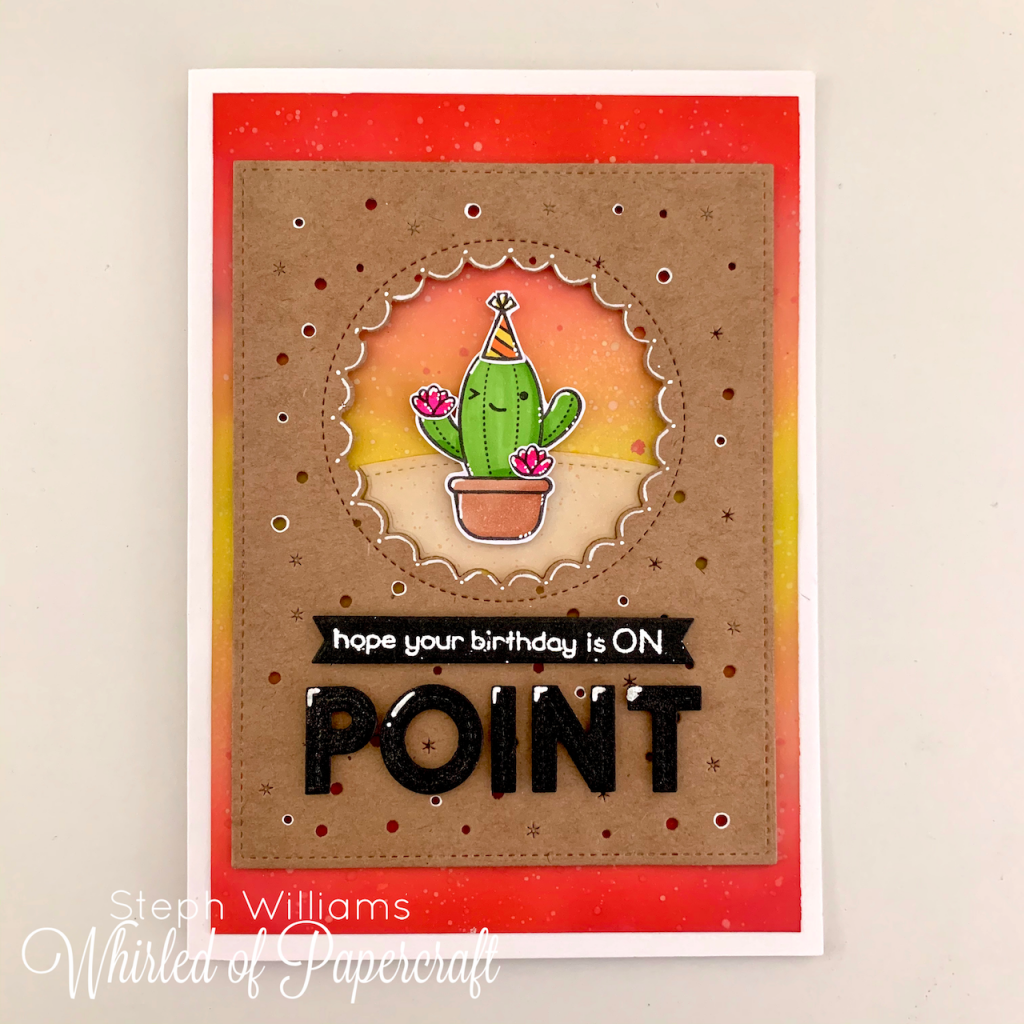
Hello!
This morning I am sharing one of my latest creations, this “On Point” birthday card! I’ve also got the step-by-step on how I made the background for this card.

I have seen so many crafters use this set to make adorable cards. This card of mine has been influenced by a few that I have seen on Pinterest and Instagram over the last few weeks.
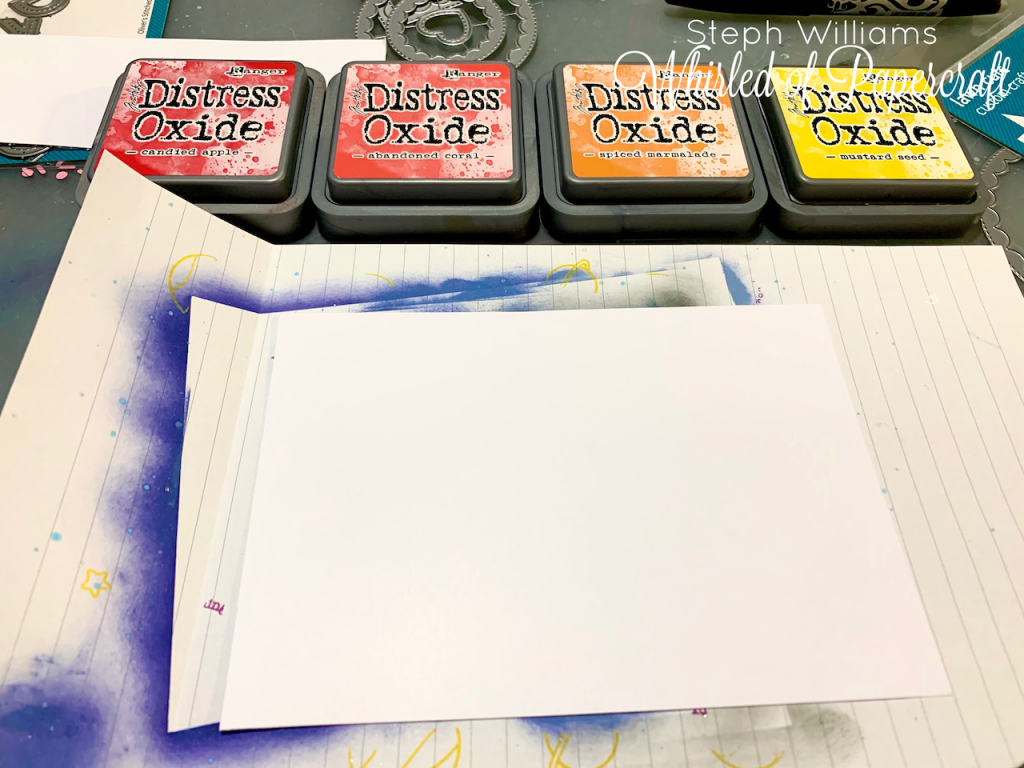
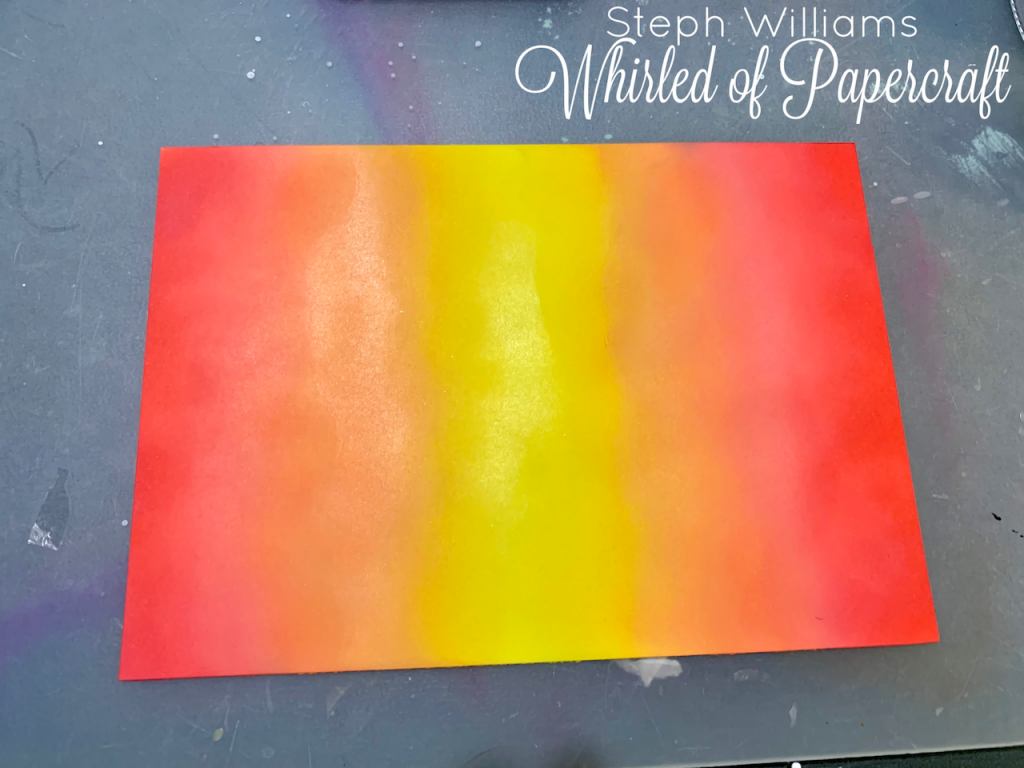
Let’s get started with how I made the background. I started out with a blank piece of plain white cardstock, cut to be slightly smaller than the front of my card base. I picked a few of my favourite distress oxide inks that I thought would make a nice, warm sunset when put together.
I started with my brightest and centre colour, Mustard Seed and started layering and blending until it was a fairly solid stripe in the centre.
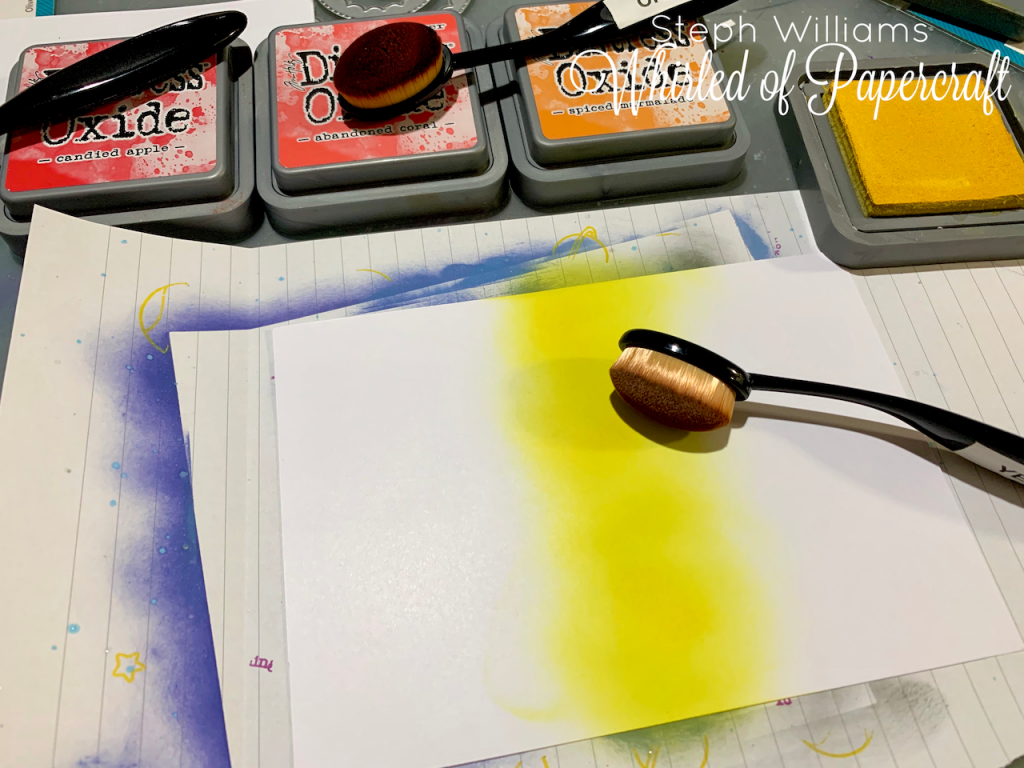
I then took my Spiced Marmalade ink and did the same on both sides of the yellow, leaving no space between them and slightly crossing over the yellow.
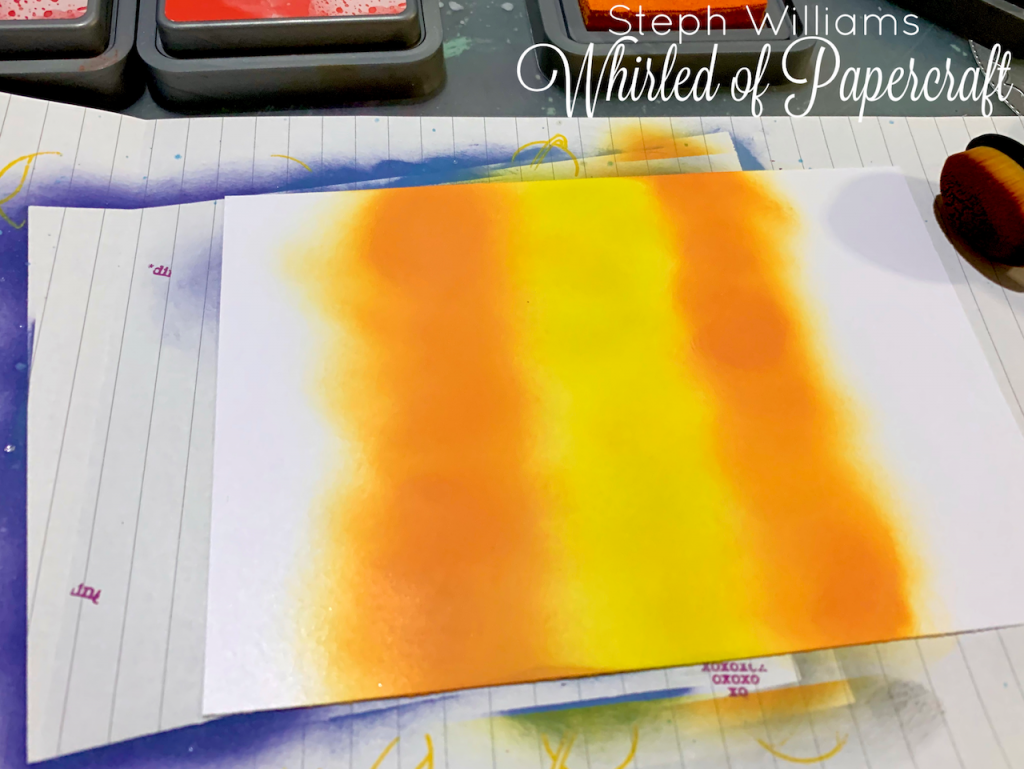
The trick to these oxide inks and getting a good blend is to go back and forth between the colours, almost piling them on top of each other on the edges where you want them to transition. I’m not sure if what I’ve done here is clearly visible, but the left side between the orange and yellow has been blended, while the right side hasn’t. It just makes everything look a little neater and less blocky if that’s the look you’re hoping to achieve.
I then did the same as the step above, but with the colour “Abandoned Coral” almost to the edges of the cardstock.
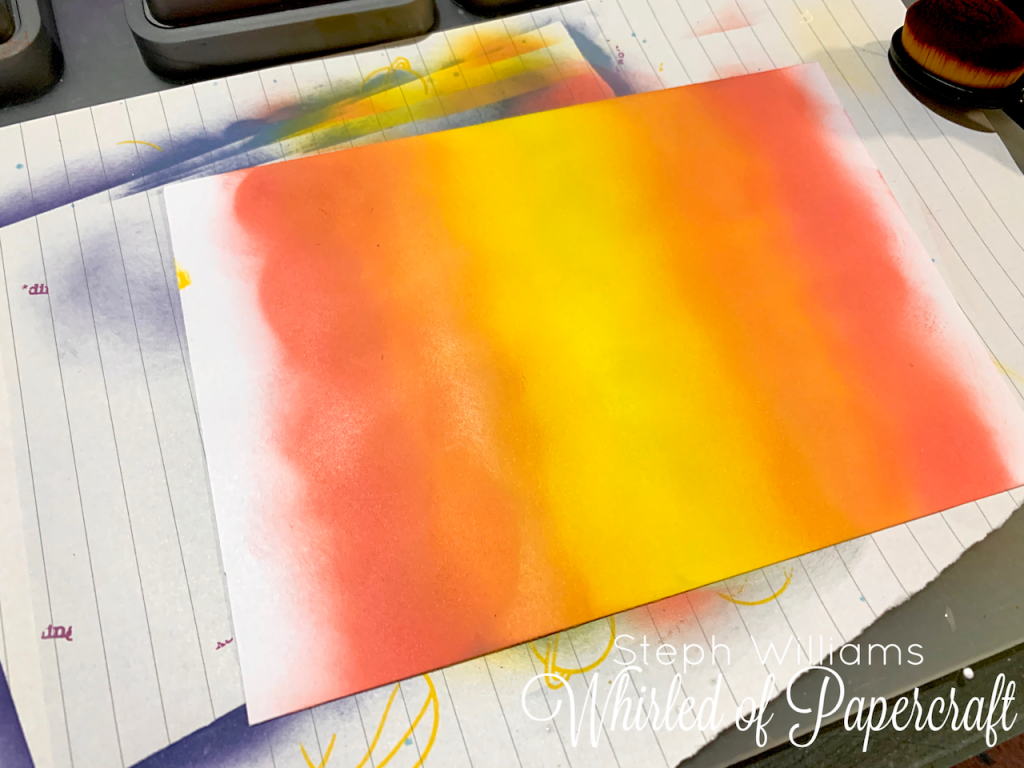
For the last colour I chose “Candied Apple”, mostly focusing on the edges of the card.
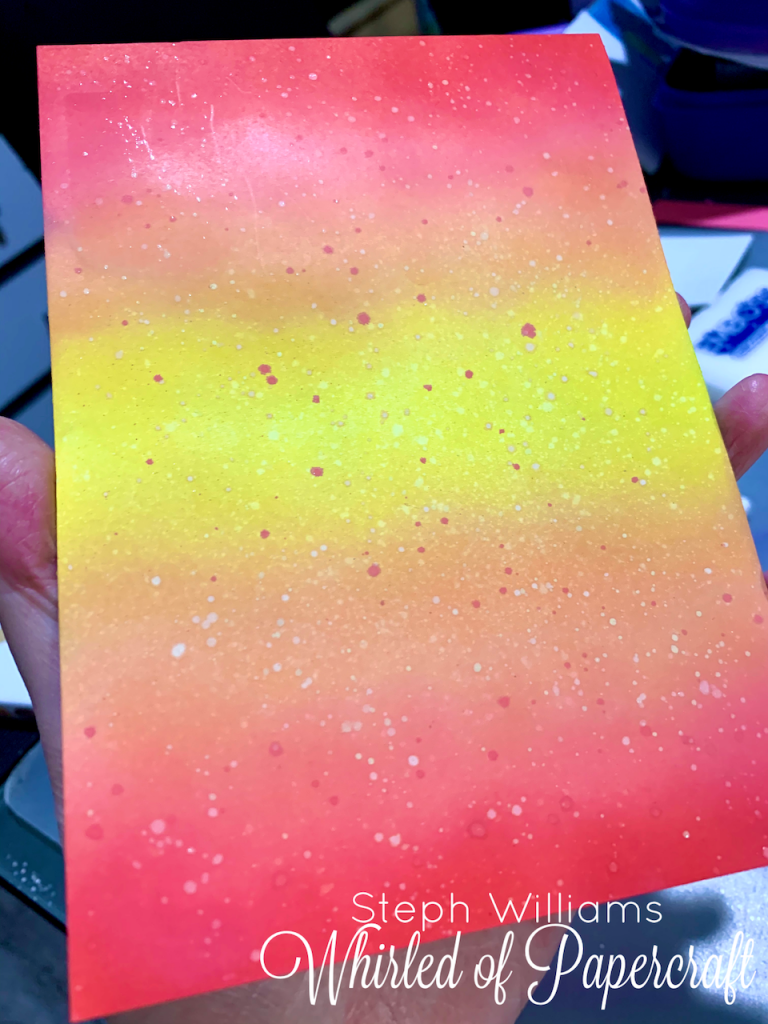
It was then time to add texture. One of my favourite things about these inks is the way they react with water. A quick spray with my spray bottle gave this look.
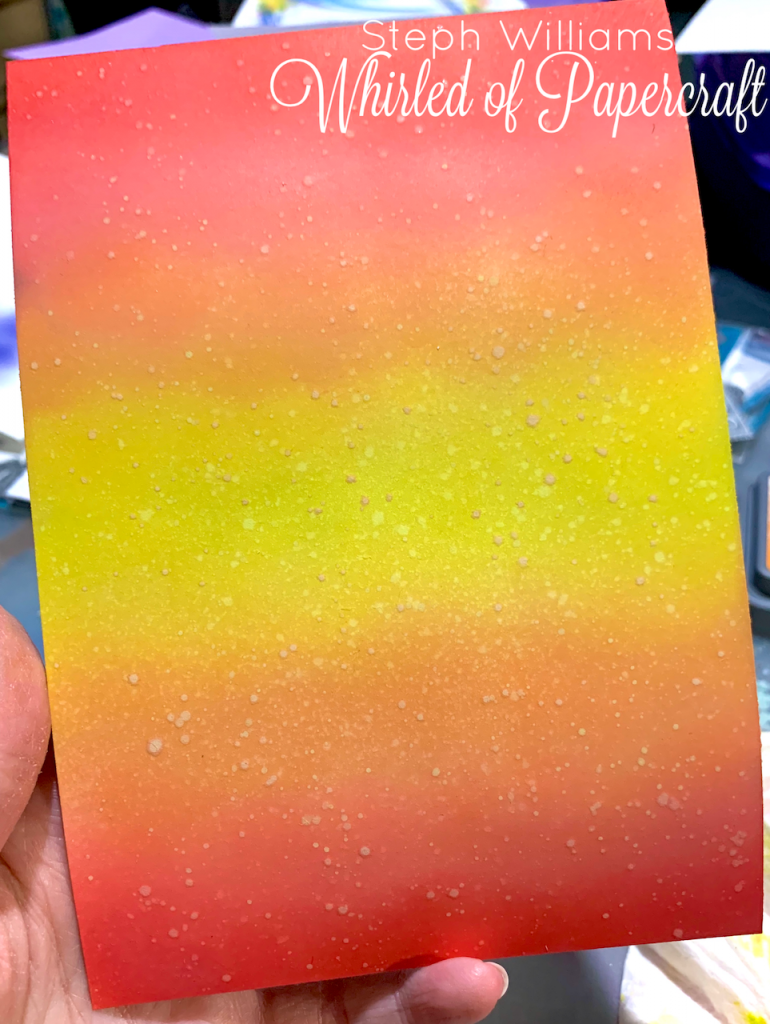
For a bit more texture, I used some of the colours I had blended to put a small amount of ink on my plastic craft mat, added water and flicked a paint brush loaded with the mix of the card to create this splattered effect.
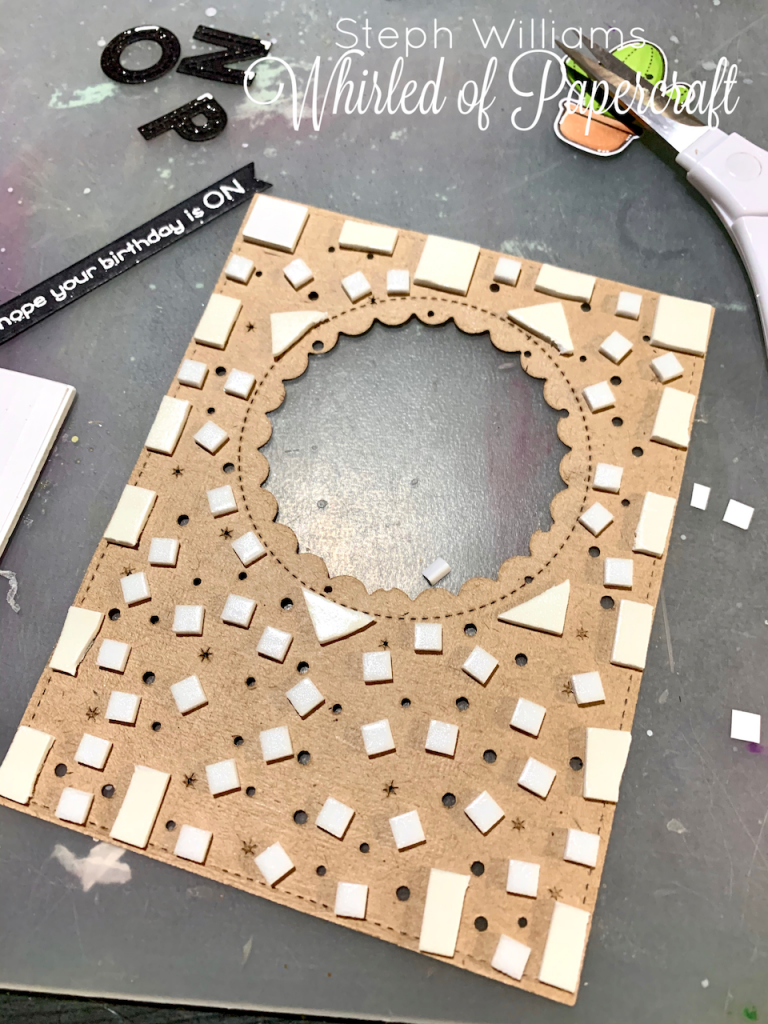
While I waited for my background to dry, I started working on the other features of the front of the card. Using the Galactic Cover die by Mama Elephant, I cut a piece of Kraft card. I cut the window using the second largest Reverse Stitched Scallop Window die by Lawn Fawn.
Then I made this mess! I’m not sure if this was the right way to go about sticking this down or not, but it was the best my tired brain could come up with in the few minutes I am baby-free to get things done. Anyway, it worked!
It was then just a matter of stamping and colouring the images, stamping the sentiment and die cutting the letters. It all came together so well!
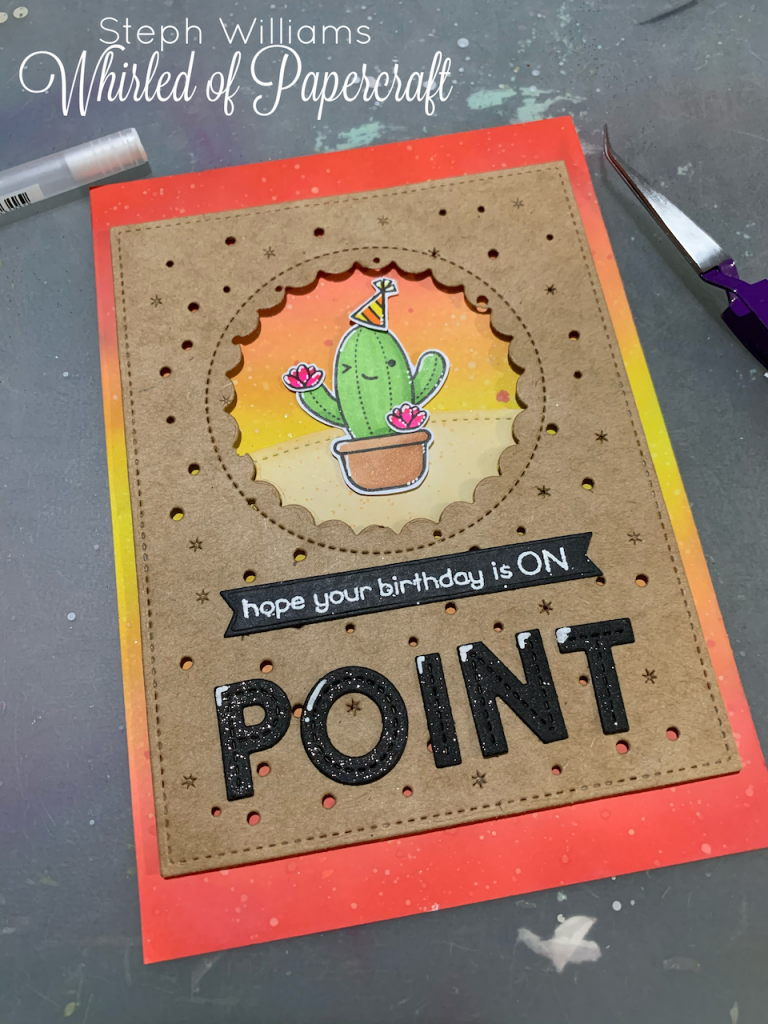
I then added some white on the edges of the window as I had seen in other cards. It really broke up all that plain Kraft card!
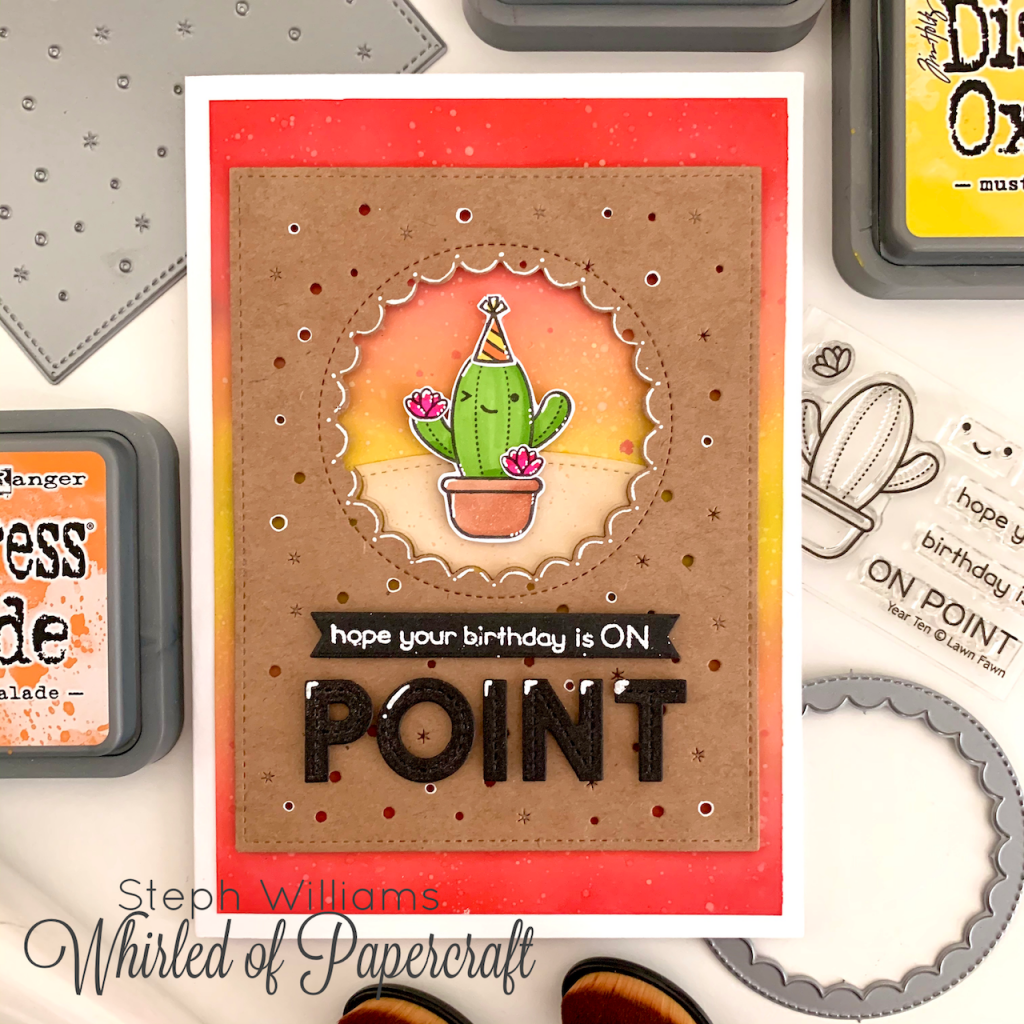
And there we have it! I love the final result, I think it’s one of my favourite cards so far, I hope the recipient loves it as much as I enjoyed making it!