
This is my first blog post! Yay!
So where do I begin?
“At the start” always seems to be the best way to go – so let’s start with my son.
After bringing that little life into the world, I knew I didn’t want a “normal” job, to go back to work and miss out on a moment of the awesome person we had created.
With a lot of work (and tight budget) we made it happen and have just hit the three year mark!
That tiny baby so quickly turned into a walking, talking, sass machine. Obsessed with our two cats, cars, trucks and anything with wheels – this kid has grown into an awesome little human!

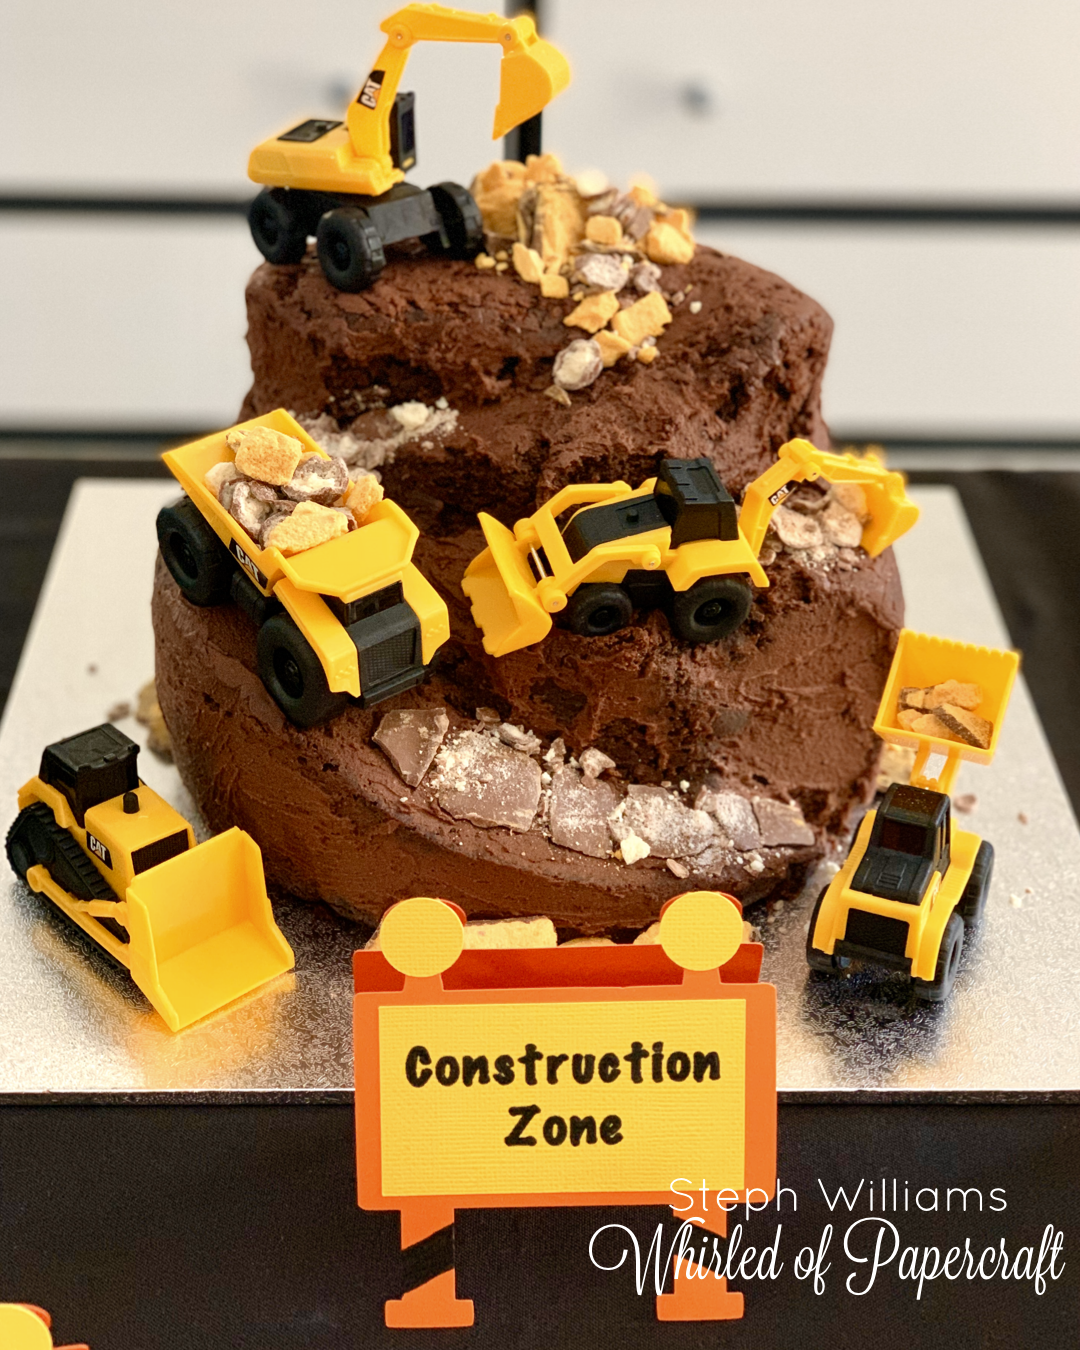
What better way to celebrate another year than a birthday party themed as one of his current favourite interests – construction!
During our time at home together over the last few years, I’d picked up a few tricks (and countless craft supplies to keep me busy!) – so I decided to go all out and see what I could create to make his day extra special!
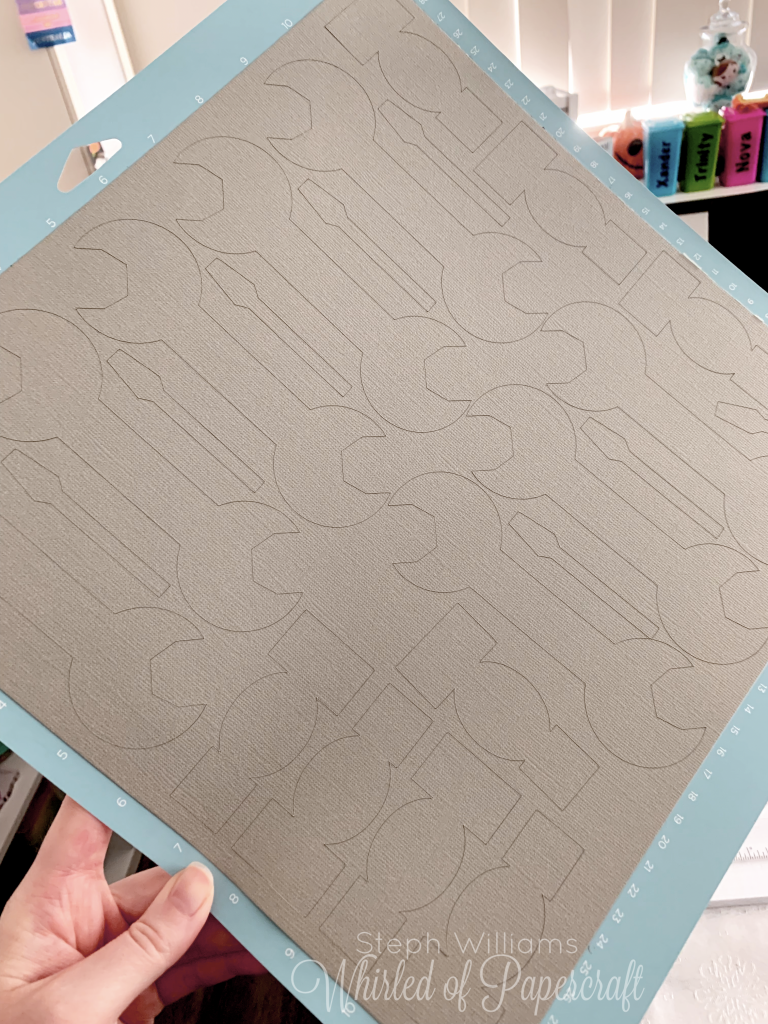
Using my favourite tool – the Cricut Maker, I set to work finding images and SVGs related to construction. These tools were perfect for quick and easy bunting, I found them here at my favourite SVG shop: https://shop.loriwhitlock.com/tools/
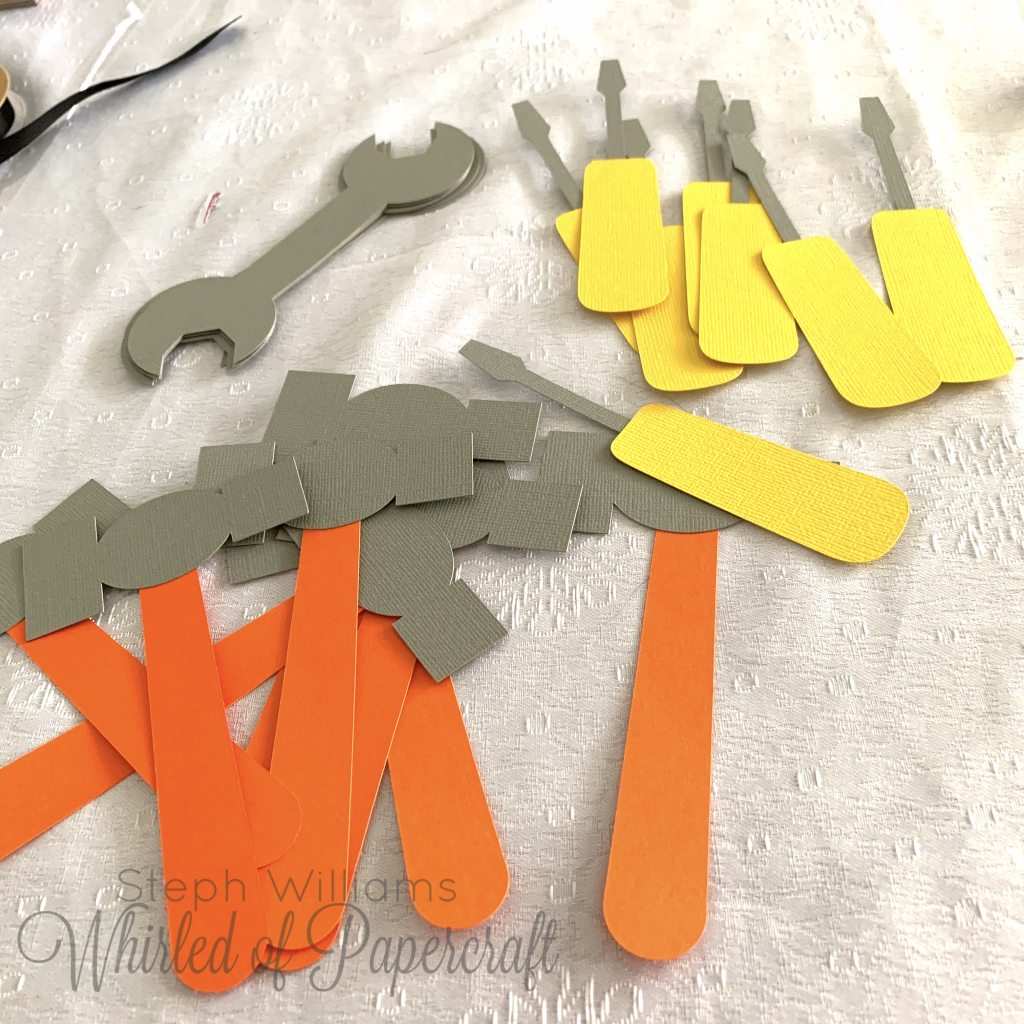
These were made using some coloured cardstock and some black ribbon that I already had on hand.
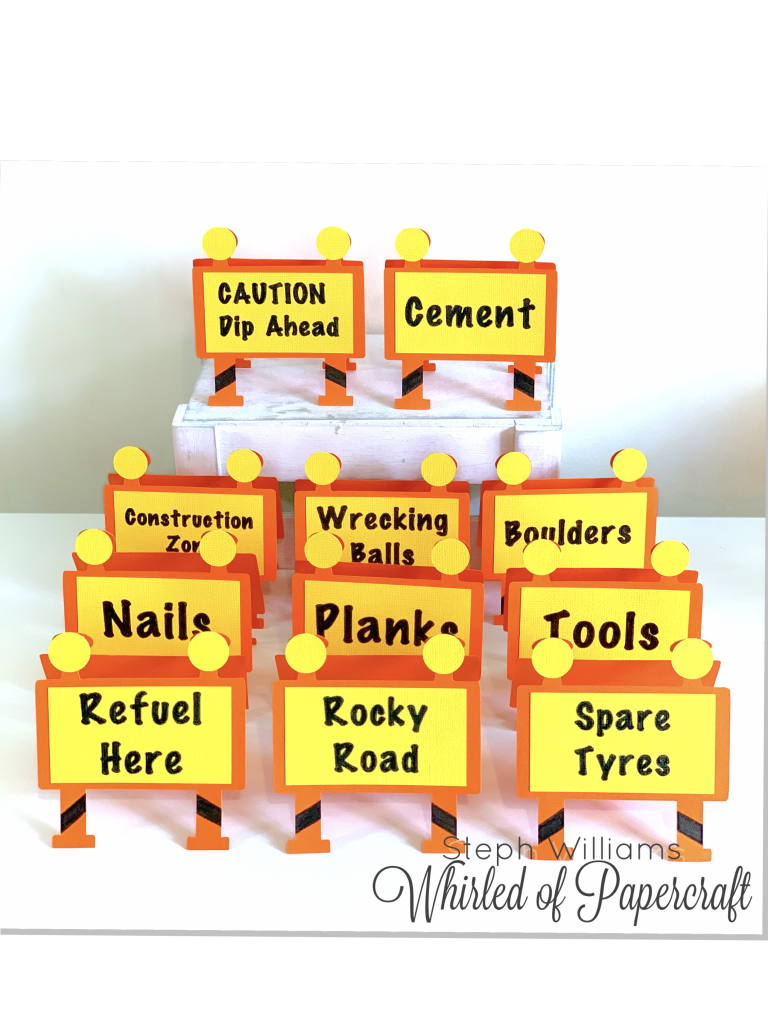
When searching for inspiration for contraction themed parties I kept seeing these cute roadblocks for food signs – a must for our party too!
They were super simple to make on my Cricut, I even had the machine write the text to keep them all neat.
Not only did they look great, but they gave our guests a good giggle too!
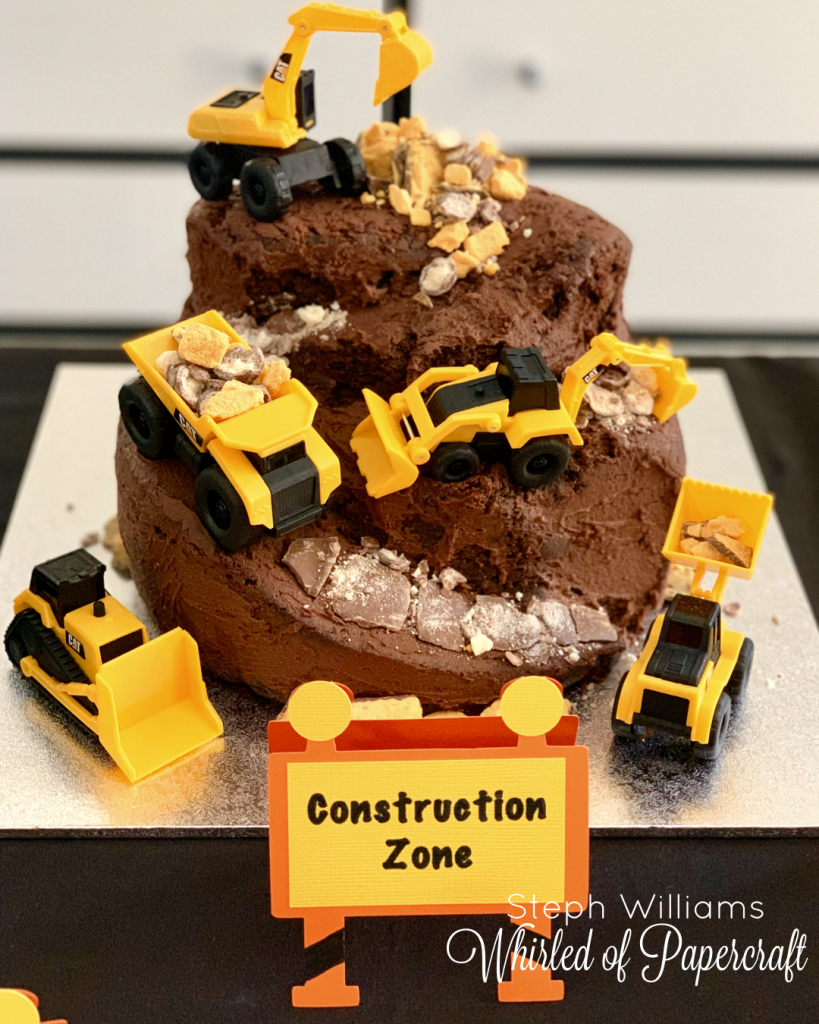
Of course the “Construction Zone” had to be the main piece – the birthday cake. I wish all birthday cakes were as easy to make. I wish my son would request a pile of dirt with trucks every year – much more simple than others that I’m sure will come for future birthdays.
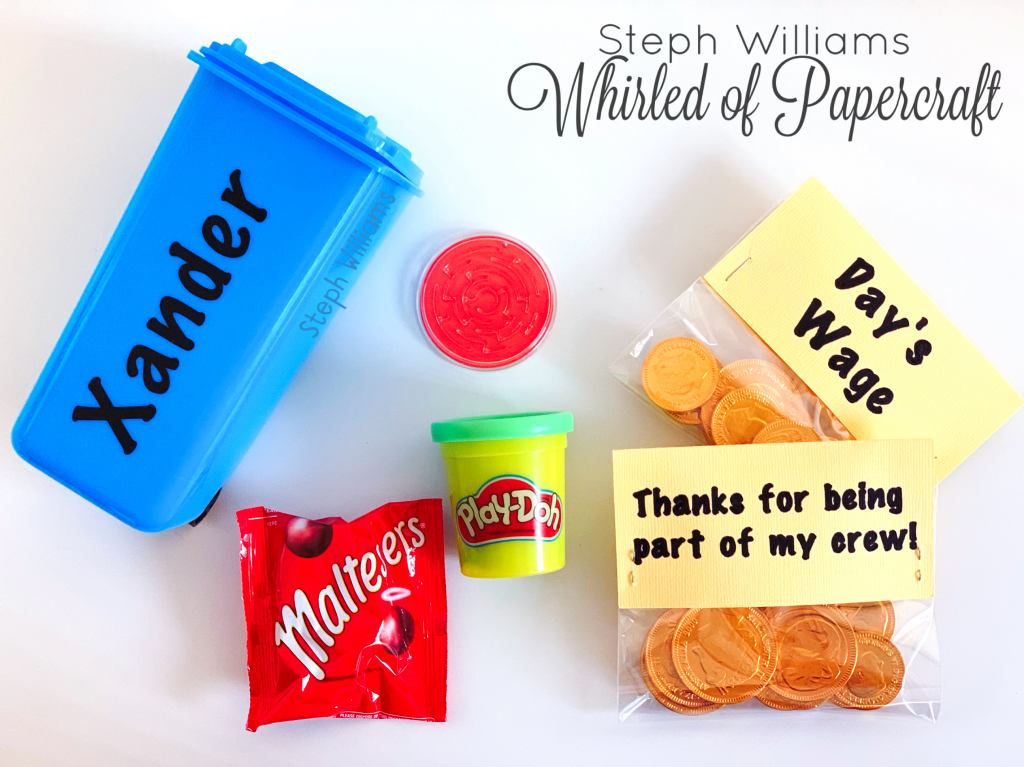
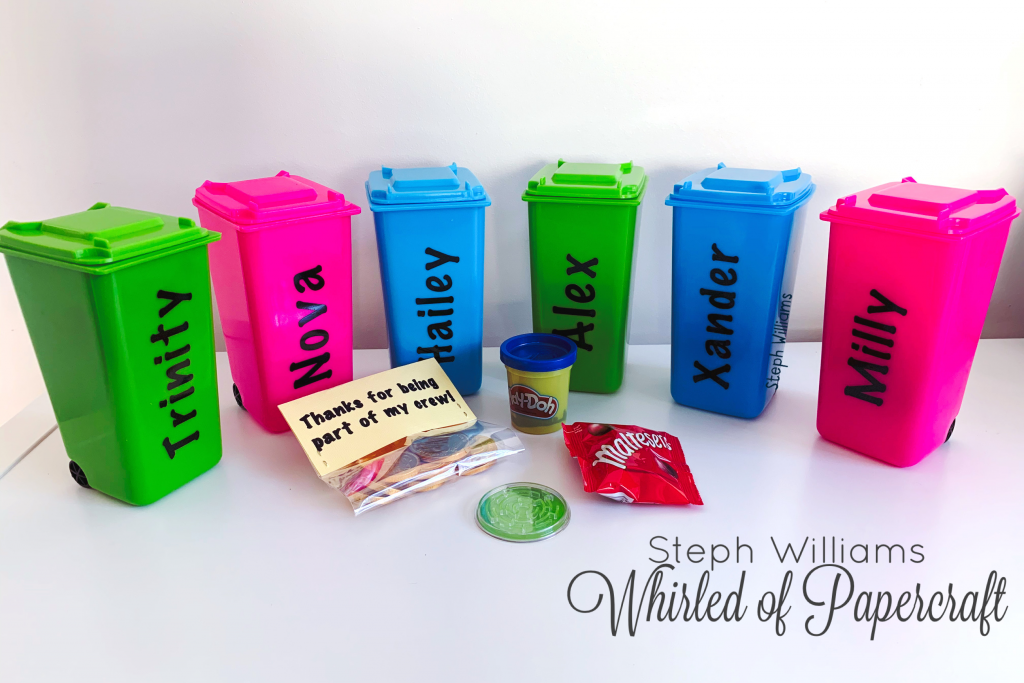
Last but not least – favour bags (or in this case, bins!). Quick and easy to put together using my Cricut to cut vinyl and write the tags – these personalised bins were loved by all!
Thanks for joining me for my first post. Next up – Christmas craft!
Very clever!
I love it- how did you make the road block signs?
Thanks, Mollie! They were fairly simple – I found a template for them on Google and instead of printing it and cutting them out, I put them through my Cricut Design Space instead and got it to do all the work for me 🙂
Would you mind sharing the link or telling me what you Google exactly. I also have cricut that I am going to use. Thanks
For sure!
There are SO many, it just depends which shape best suits what you’re after 🙂
https://www.google.com/search?q=road+block+svg&tbm=isch&ved=2ahUKEwia9Yj-7cnsAhXSSSsKHbJQAigQ2-cCegQIABAA&oq=road+block+svg&gs_lcp=CgNpbWcQAzoECCMQJzoECAAQQzoCCABQvGhY3oABYMGDAWgDcAB4AIABygKIAccLkgEHMC4zLjMuMZgBAKABAaoBC2d3cy13aXotaW1nwAEB&sclient=img&ei=mlmSX5rAMNKTrQGyoYnAAg&bih=877&biw=1625&client=safari